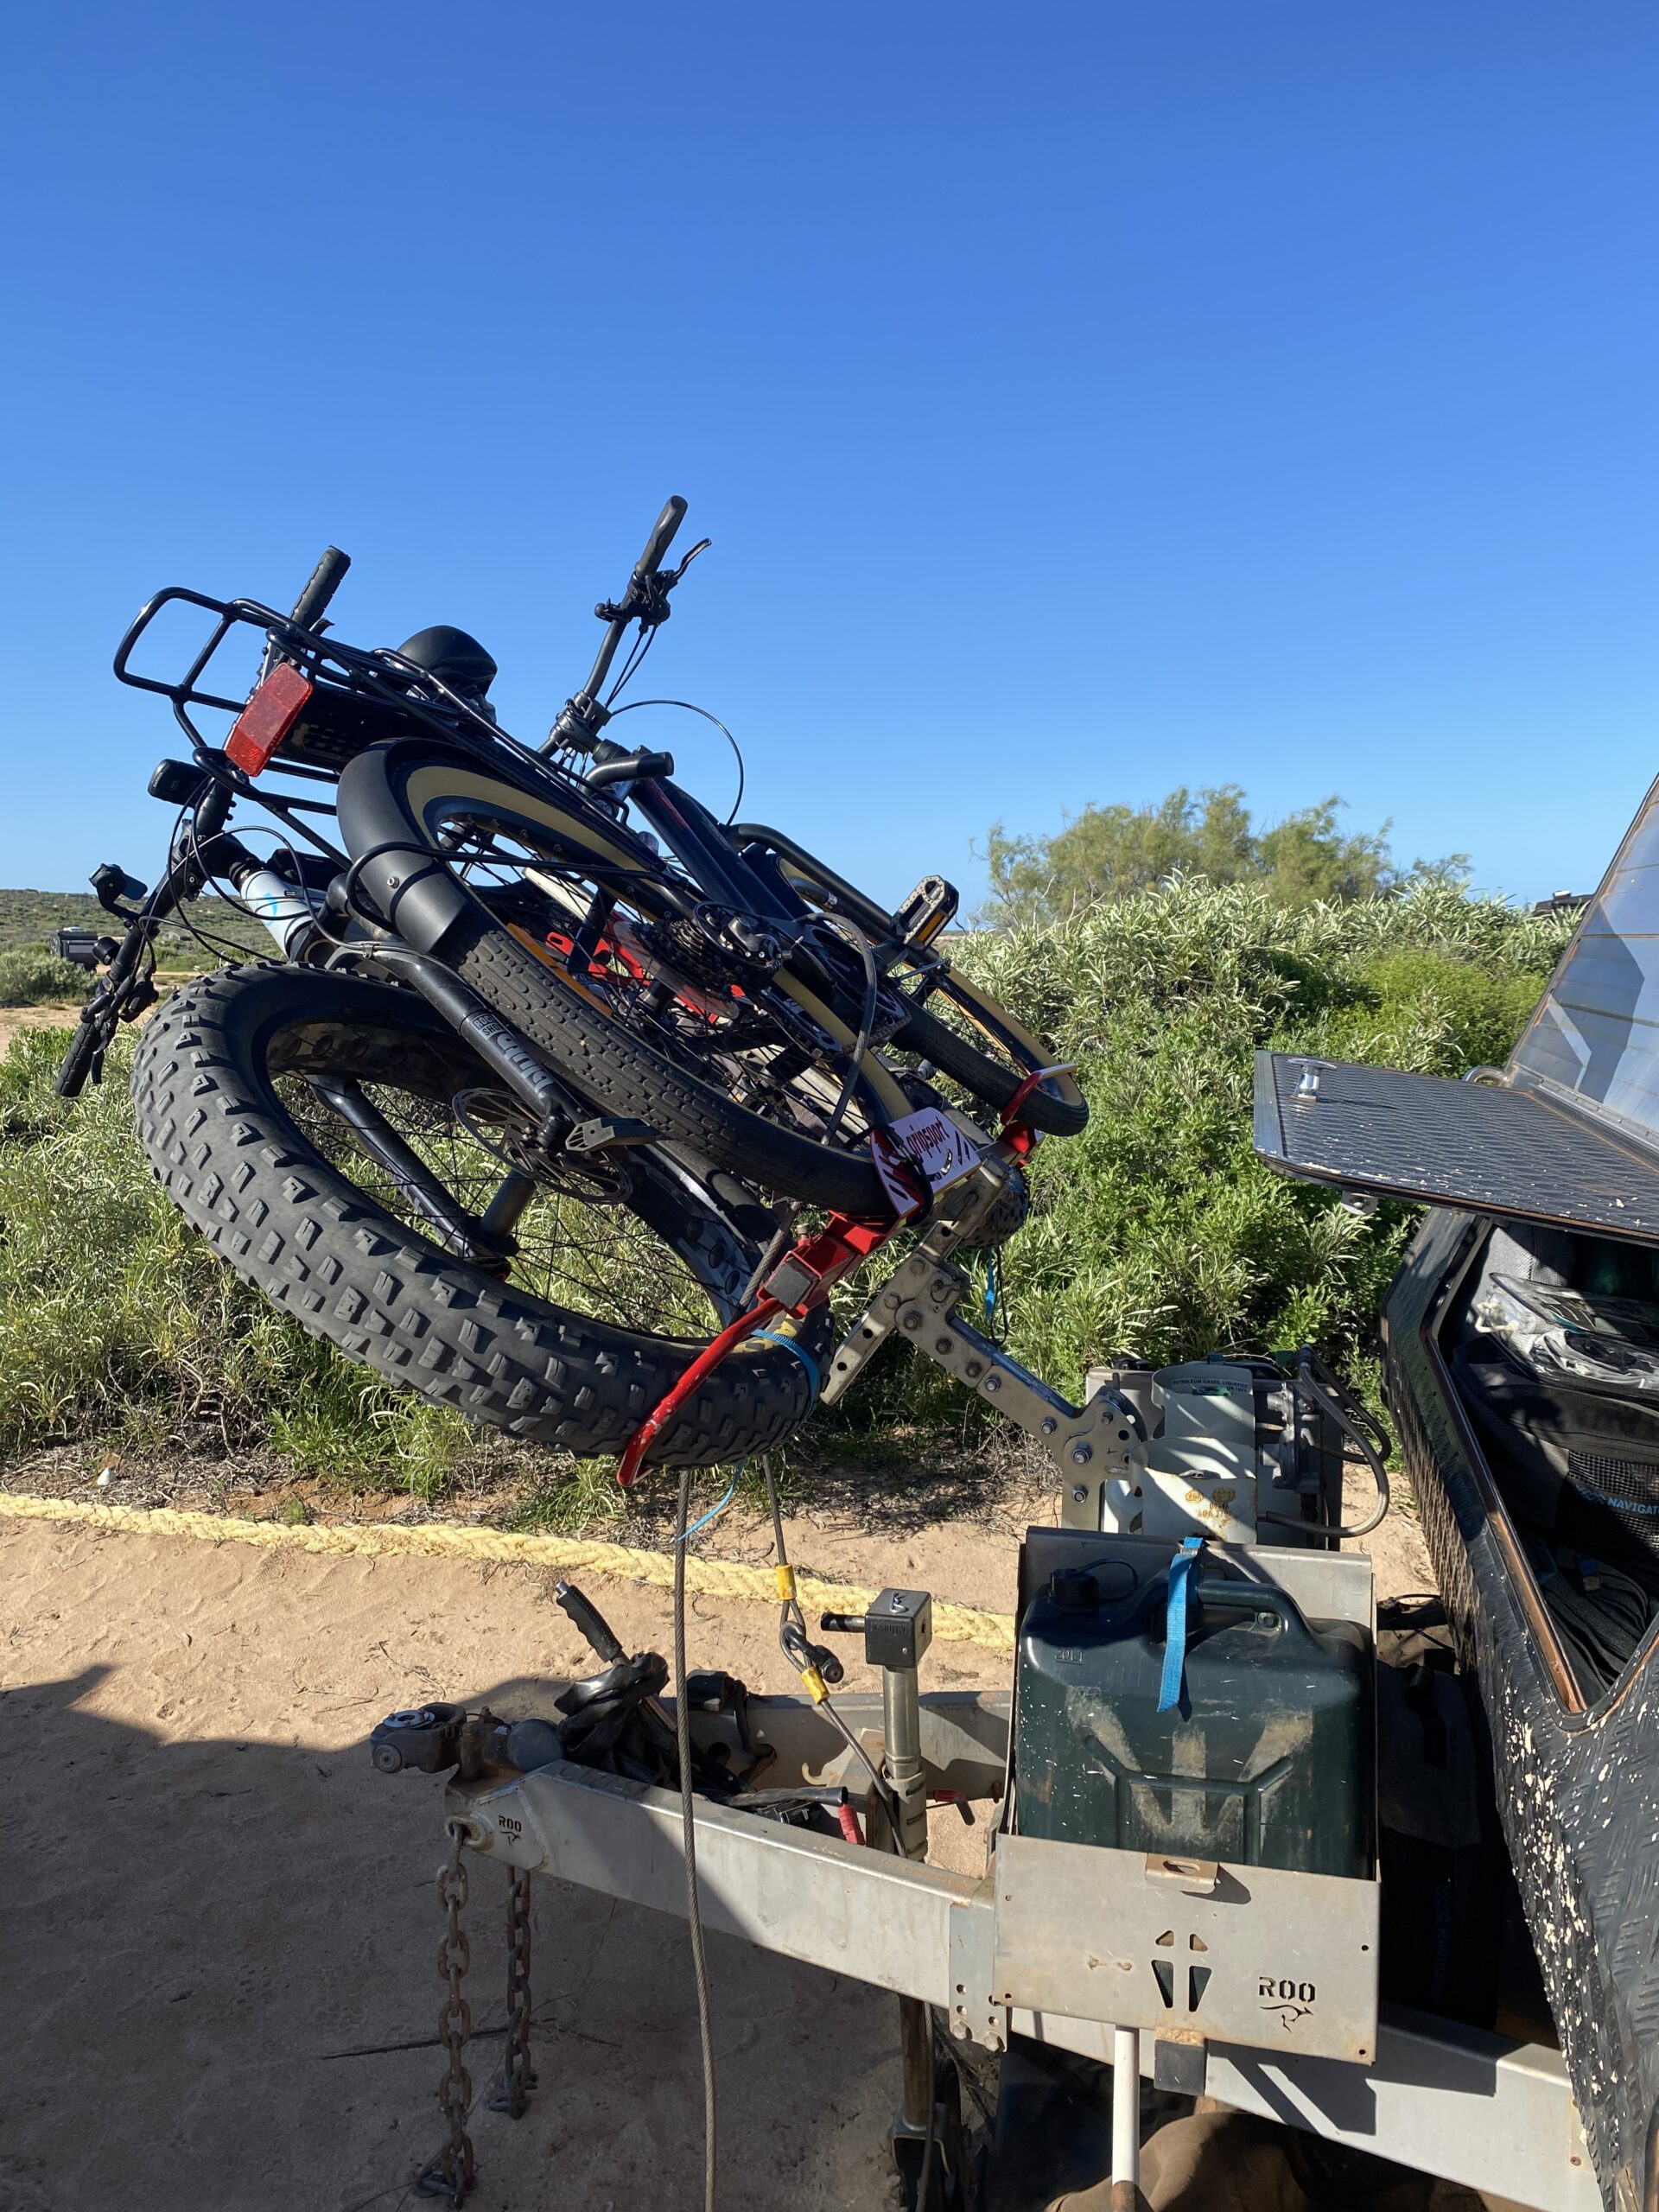
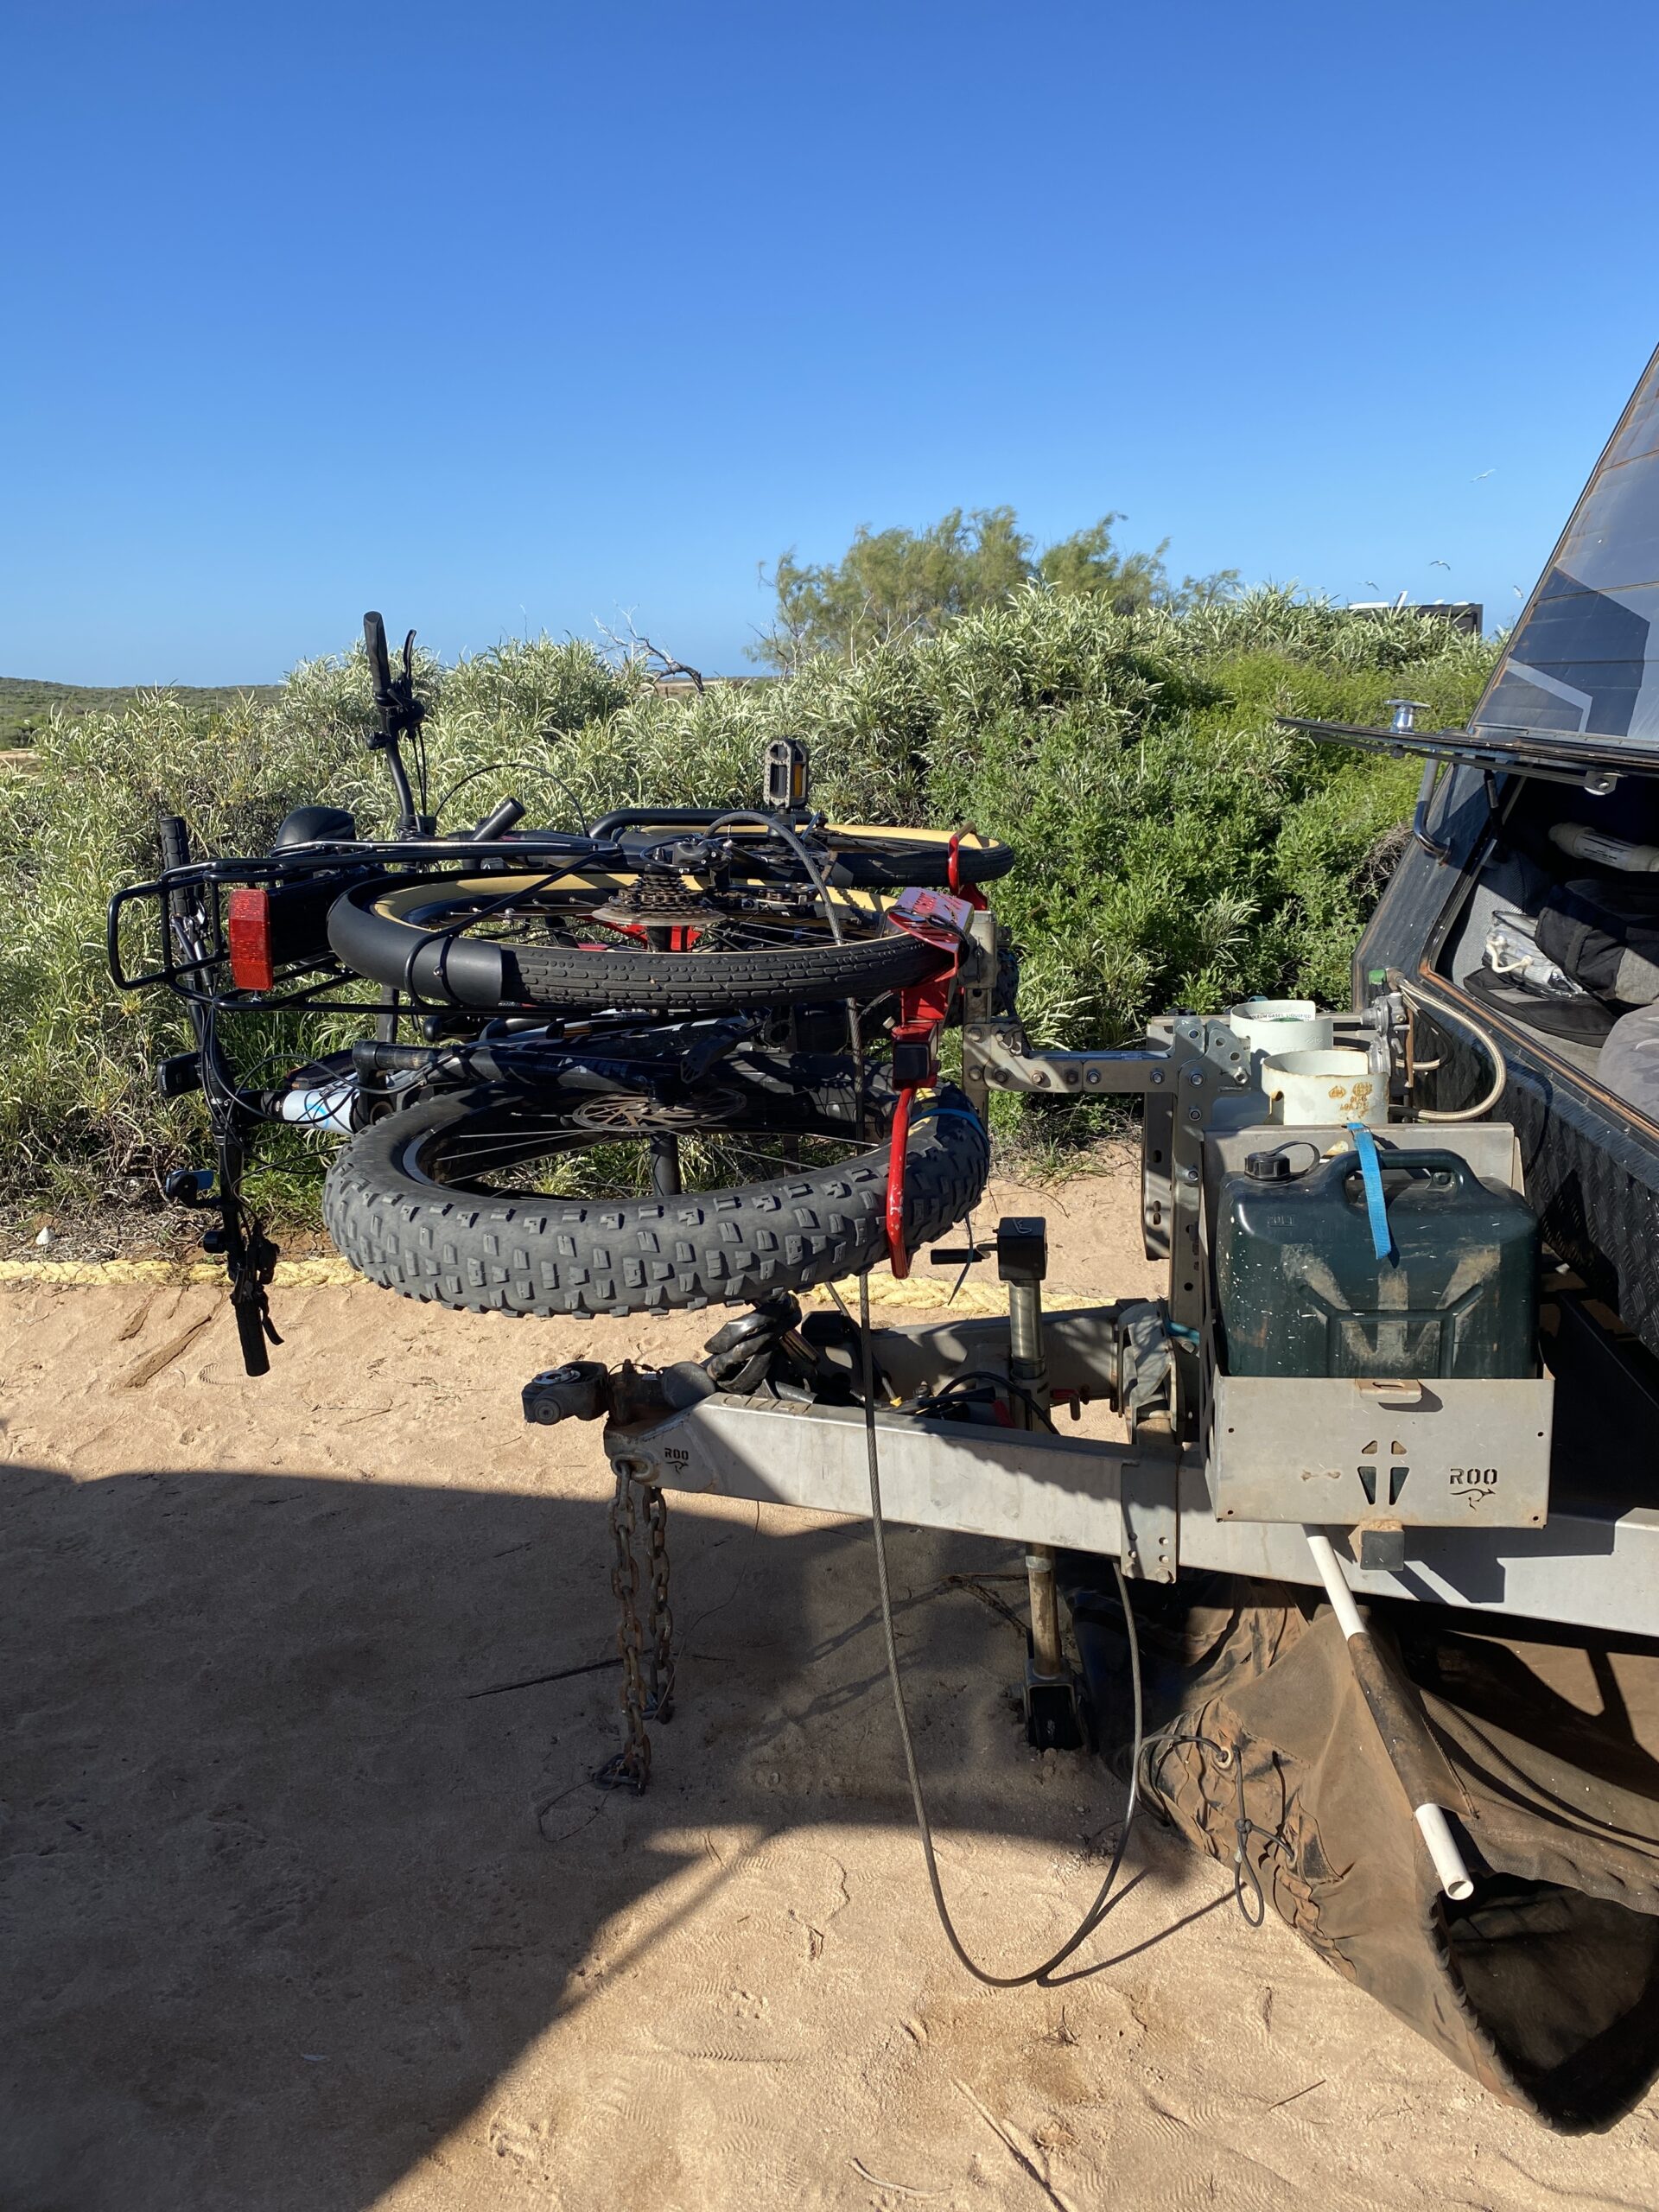
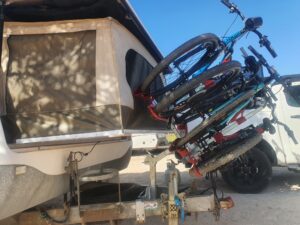
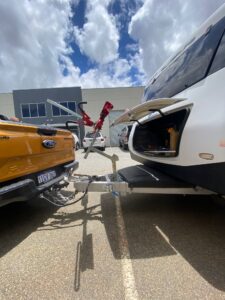
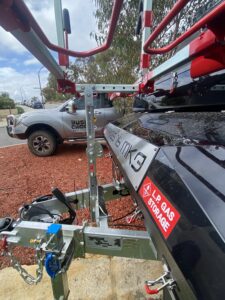
New Release Mid-Post Tilting Mechanism
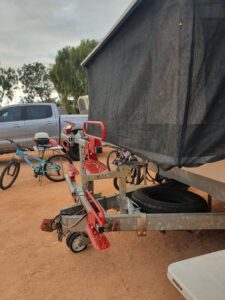
We originally designed the Bush Chook Mid-Post Tilting Mechanism (along with our post kit) for owners of Jayco Expanda type vans, as the only method to extend the beds was to remove the bikes and the rack. We soon realised it is also perfectly suited to many other applications including caravans with large front opening boots, caravans with short drawbars, Ezytrail Parkes and Ceduna models, forward fold camper trailers and really anyone who would like extra access to items under or behind the rack.

expanda vans
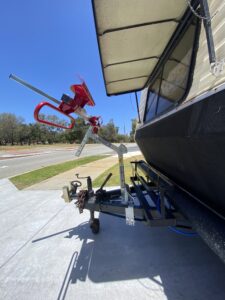
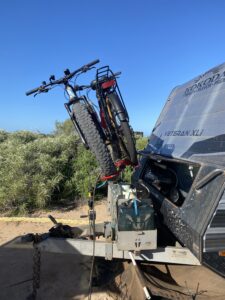
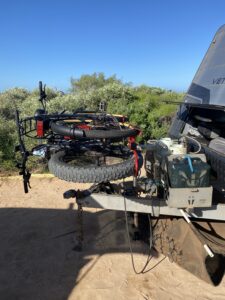
For Expanda type van owners, our new mid-post tilting mechanism means that bikes and the rack no longer need to be removed in order to extend the front bed.
large front boots
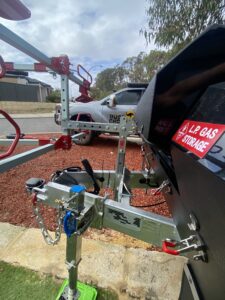
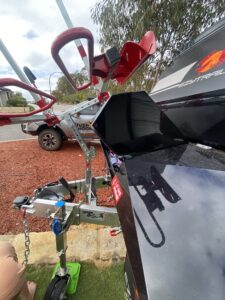
For owners with a large hinged front opening boot, like some of the Jayco Sterling/Silverline models and some Euro brands, previously there was no way to access the boot fully without it clashing with the post. This is now as simple as removing the locating pin and tilting the post.
ezytrail
For Ezytrail owners with the Parkes & Ceduna models, utilising the existing cross member meant altering or spacing the Gripsport post as the front boot lid clashed with the upper tilting mechanism. The only option was to install a cross member if there was room forward of the existing one. To fit a Gripsport van rack is now as simple as installing our Bush Chook Mid-Post Tilting Mechanism. The front boot can be easily opened as the top of the post assembly swings out of the way allowing full access, this is now as simple as removing the locating pin and tilting the post.
short drawbars
Owners of vans with short drawbars previously could not open their front window or boot as the post or rack assembly would clash. the solution is now as simple as removing the pin and tilting the rack.
For owners of forward fold campers who really had no solution to carry bikes on their campers apart from removing the rack, this is now possible.
how does it work?
This new setup requires two separate posts, upper and lower. The posts can be made DIY or we can supply you our pre-drilled, ready to install post kits. Our posts are 50x50x4mm Duragal and are cut and drilled specifically to suit the Gripsport bolt on mount and tilt/non-tilt mechanism.
Our posts are also available to purchase singularly. This is handy if you currently have a short post and would like to use it for the bottom section and purchase the top section which is drilled to suit the standard Gripsport rack tilting/non-tilting assembly at 50mm centres.

Both posts can be cut to size to suit whatever application required.
For example, you may need a higher bottom post to clear a centre mount jockey wheel (for clearance when the rack is tilted forward).
Some expanding bed vans extend even further forward than the Jayco Expanda which would require a shorter bottom post and longer top post.
If you already have a GripSport van rack and would like to make your setup easier, you can purchase the mid-post tilting mechanism, it may be possible to utilise your existing post but it will have to be cut and drilled to suit your application.
POST KITS
Our new universal post kits contain two separate posts.
LOWER POST
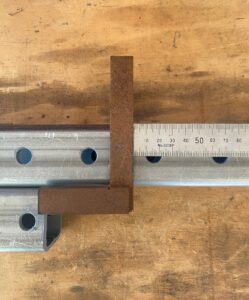
The lower post is 480mm in length and drilled at 90mm centres its entire length, this suits the GripSport bolt on mount and the lower side of the mid-post tilting mechanism. The post can be cut to length to suit whatever clearance the rack needs when tilted. The shortest this post can be cut to is 300mm.
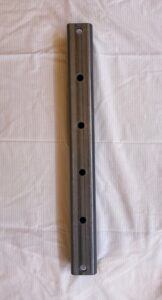
LOWER POST (above) 480mmL @ 90mm Centres
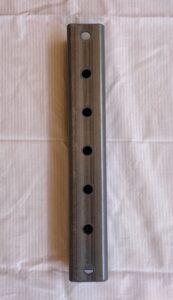
UPPER POST (above) 330mmL @ 50mm Centres
The upper post is 330mm in length and drilled at 50mm centres its entire length, this suits both the GripSport tilting or fixed mechanism and the upper side of the mid-post tilting mechanism. The post can be cut to length to suit whatever clearance the rack needs when tilted. The shortest this post can be cut to is 230mm.
CLEARANCE HEIGHTS FOR POST KITS
The following are the clearance heights from the top of the drawbar to the underside of the van rack pinch bolts.
WITH GRIPSPORT TILTING MECHANISM ATTACHED
Maximum Clearance: 885mm
Minimum Clearance: 560mm
WITH GRIPSPORT NON-TILTING MECHANISM ATTACHED
Maximum Clearance: 840mm
Minimum Clearance: 500mm
SETTING UP POST HEIGHTS
Setting up the post heights depends very much on the current location of the rack on on your drawbar, and also if you would like to be able to tilt the rack at 90 degrees with the bikes still on. This will require the bottom post section to be higher to allow for the width of the bikes so they don’t clash with your drawbar or items on it.
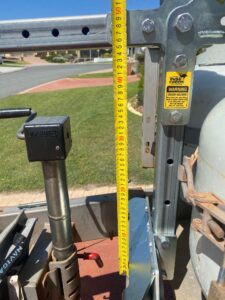
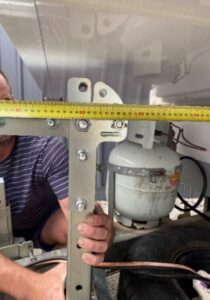
If you have purchased our post kit, the highest setting of the rack arm (underside when horizontal) is 450mm above the drawbar (per pic above). We supply this with our kits for Expanda vans as this is the maximum height to allow the beds to push out.
We can supply custom posts if extra clearance height is required but height restrictions will apply, this means a shorter top post to keep the overall height down.
To check clearance, bolt the post onto the Gripsport bolt on mount and adjust the height settings in various positions to check how high you will need to go to clear items on your drawbar.
If you’re unsure, please send us some pics of your van, we may require a few measurements as well. It’s possible that not all setups will be compatible with our pre-cut posts, we can supply custom sized posts if required.
I ALREADY HAVE A TILT MECHANISM ON MY RACK
If your rack has the GripSport tilting mechanism already, you can still use this with the new setup, although it won’t be required. Our recommendation is to replace the GripSport tilting mechanism with their fixed version (we can supply this). This will eliminate any play/rattle the mechanism has and also reduce the overall height and weight.
POSTS FOR EXPANDA VANS
Our new lower post is made to a height that will clear the underside of the pull out bed (at full length) with the mid-post tilting mechanism installed in the tilted position.
The posts have several holes drilled to adjust the height if required.
As with the standard Gripsport setup with a short quick release post, our recommendation would be to keep your rack as low as possible and cut both the upper and lower posts to suit.
HOW HIGH?
If making your own custom posts, it doesn’t matter if the height of the new setup is higher than the existing short quick release post (in most cases it will), as long as the bed doesn’t clash with the tilt mechanism when tilted. This is easy to check before any cutting needs to be done.
If doing this there are height restrictions, as too high will result in too much leverage and may result in damage to the rack and components and void warranty.
The maximum height allowed from the top of the drawbar to the underside of the rack is 885mm, this is the height of both our supplied posts combined at their maximum height if reusing your Gripsport tilting mechanism.
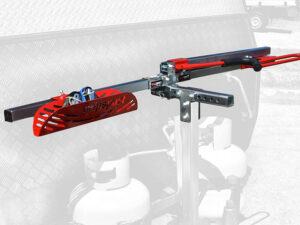
CUTTING SUPPLIED POST KIT POSTS
If you have purchased our pre-drilled post kit, they can be cut to whatever length you need for your setup. The lower post is drilled at 90mm centres and the upper post at 50mm centres their entire length. This will give you many options to select the correct height and length of the tilting arm. Once you have worked out your lengths, cut the posts at 15mm past the hole centre (as per pic left), this is the same measurement as the cut ends of the posts. Touch up the cut edge with some zinc paint and you are ready to install.
I HAVE A QUICK RELEASE POST WITH MY GRIPSPORT VAN RACK
If you have Gripsport’s quick release post it may be possible to use this to retrofit to the mid-post tilt mech. Because of its short length the overall height will be at the lowest possible setting.
Depending on where your rack is located on your drawbar the short upper post may not give you enough length to clear the pull-out bed once tilted. To check this, you will need to measure the distance from the end of the bed back to the post, it depends on where your cross member is located with the mount on your drawbar. Some cutting/drilling will be required, it’s also possible to reuse the top quick release section, although this function will no longer be required.
Check the height of your post to ensure the pull out bed doesn’t clash, also check the horizontal distance required for the rack to clear the bed once tilted.
BOLTING IT TOGETHER
The new mid-post tilting mechanism is supplied with all of the hi-tensile zinc plated bolts with Nyloc nuts required for assembly. We have made the tilt mechanism and posts so there is little tolerance between the drilled holes and bolts. This is to avoid any movement within the holes/bolts during transit. You may find assembling the mechanism and lining up the bolts onto the posts quite tight, use a podgy bar or similar to line up the holes and insert bolts, then tighten the bolts including the 16mm main pivot bolt and check all often.
OPERATING THE MID-POST TILTING MECHANSIM
The new mid-post tilting mechanism has three tilt settings, on many occasions you might only need to tilt to the first hole setting.
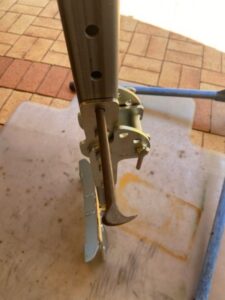
To operate the tilt first remove the safety “R’ clip, then unscrew the fastening wing bolt.
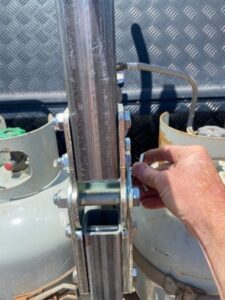

CHECK ALL BOLTS OFTEN & ENSURE THE LOCATING WING BOLT IS IN POSITION WITH “R” CLIP INSERTED
Remove the wing bolt whilst holding the weight of the rack, then pull towards yourself to tilt. If only a limited tilt is required insert the pin in the first hole and reinsert the “R” clip. If extra tilt is required, move to the next locating hole. Please be careful at this stage as the weight of the rack and bikes maybe heavy and you may need assistance. If the full tilt function is required, make sure you have assistance as it could be heavy. At horizontal the tilt mechanism has a stop to ensure it doesn’t go past 90 degrees. The pin is not required in this position, place it in a safe place along with the “R” clip like one of the unused tilt holes.
WARNING: ALWAYS SUPPORT THE RACK WHILE LOWERING, NEVER LET THE RACK FALL TO ITS STOP POSITION.
When moving the post back to the vertical position keeps fingers and hands away from the tilting mechanism. This is a crush hazard and could cause serious injury.
If the rack and bikes are heavy ALWAYS seek assistance when moving back to vertical.
Never drive with the pin removed, ALWAYS check the wing bolt is tight and “R” inserted.
The post MUST be in the vertical position when travelling.
If you have any questions regarding assembly or fitting, please contact us:
Email: info@bushchookrvleisure.com.au
Phone: 0418938005