

THE GRIPSPORT BIKE RACK ADVANTAGE
If you have a suitable cross member within the cross member "zone" you can simply goahead and fit the Bolt-On Mount to it (per pic below). Make sure there is enough clearanceeither side of the cross member for the Bolt-On Mount and its vertical post.
What if my jockey wheel is fitted to the cross member I want to use for the Bolt-On Mount?
It may still be possible to fit the Bolt-On Mount to an existing cross member even if there is a jockey wheel fitted there (as per pic below). If doing this, a side-winding or bottle-jack jockey wheel is required.

NOTE - It is not possible to fit the Bolt-On Mount to those jockey wheel cross members that have a second rectangular steel section welded on top (forming a "stack "). As per pic below.

YOU NEED TO KNOW…There are three fitting methods covered in this guide.They are exactly the same for all “Van-Racks” (both tilting and non-tilting models).We haven’t yet come across a van or camper that can’t be fitted with a GripSport rack.Option 2 of Fitting Method 2 (on page 9 of the Fitting Guide) will apply to 80% of vans.
.png)
.JPG)
By far the best (and most common) way of mounting Van-Racks to an “A” frame is with the “Bolt-On Mount” that fits over a cross member as shown in the photo above. This is Method 1 & 2 from the Fitting Guide (and the video left).
But when the “A” frame doesn’t have a suitable cross member in the right place, then a new one needs to be fitted to the chassis. This is Method 2 from the Fitting Guide and is the required Fitting Method in approx 80% of cases.

Fitting the new cross member (above) has always involved welding directly to the “A” frame and while there is absolutely no issue in doing that (so long as it’s done properly), some customers and some manufacturers refuse to OK it. Which is why Gripsport developed this new fitting method that does not require any welding on the “A” frame at all.

The new cross member that would normally have been welded into place between the arms of the “A” frame, now gets welded into place between the A-Frame “SADDLES” (see step 2 below). The whole lot can be lifted off the van (for full welding/painting) then slipped back onto the “A” frame (as Step 3 below) so the Bolt-On Mount and Van-Rack can then be fitted as usual.
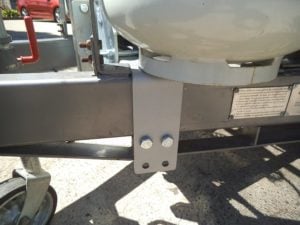
Step 1 – These “SADDLES” are now included as standard with every Bolt-On Mount. They simply slip down over each arm of the “A” frame.

The “SADDLES” suit 50 x 100 and 50 x 125 and 50 x 150 box ‘A’ frame sections and come with Hi-Tensile bolts and Nyloc (self-locking) nuts.


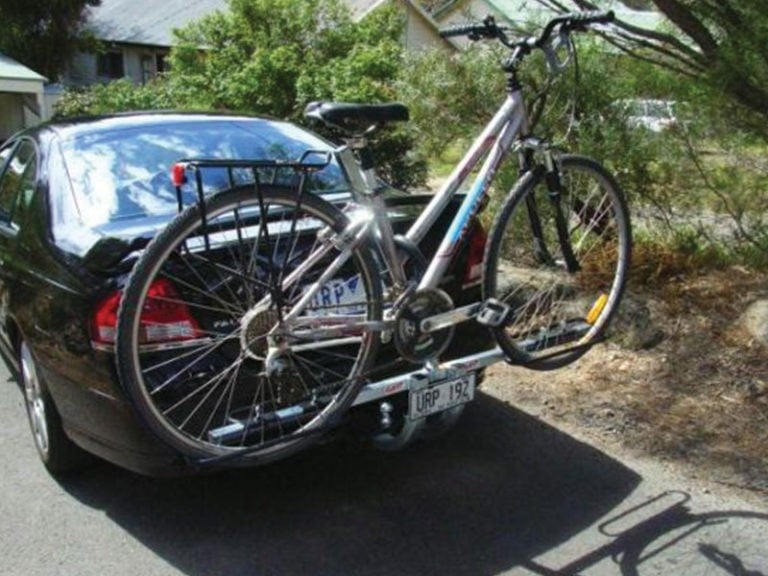
Can I mount the rack to my rear of my van?
Fitting a GripSport Van-Rack to the REAR bumper. IMPORTANT – MUST READ
Even if it LOOKS like your van has a nice, solid chassis and rear bumper-bar across the back and even though it may SEEM perfectly logical to carry your bikes there… be aware that the amount of “bounce” at the rear of a van is surprisingly severe… even if you don’t notice it. This can result in damage to bikes, bike rack, and even the van itself. In fact, some van manufacturers will void their warranty, and you may find insurance claims are denied, if a bike rack is fitted to the rear against the advice of the van or rack manufacturer. So our advice is as follows…1/ The correct, proper and safest place to carry bikes is on the “A” frame.2/ We recommend against fitting bike racks to the rear of caravans & camper trailers.But it IS possible… in SOME cases GripSport Van-Racks (1 & 2-bike ONLY) should only be fitted to the rear of a van...using the GripSport "Bolt-On Mount" to a rear bumper made of 50mm x 75mm rectangular steel box section after determining the rear of your van is strong enough - consult your caravan dealer or manufacturer for advice.

Warning
Rear mounting bike racks can lead to catastrophic failure
.gif)
.jpg)


These heavy-duty adapters let you fit your “Van-Racks” quickly and easily onto any vehicle with a 2″ (50mm) square hitch towbar.
There’s two different adapters – one for 1 and 2-bike Van-Racks and another for 3 and 4-bike Van Racks. They both work exactly the same way and they both work with tilting and non-tilting Van-Racks.*
There’s two different adapters – one for 1 and 2-bike Van-Racks and another for 3 and 4-bike Van Racks. They both work exactly the same way and they both work with tilting and non-tilting Van-Racks.*

1/ Adapters slip straight into any 2″ (50mm) square hitch towbar receiver and are secured with your own towbar’s quick-release pin and anti-rattle bolt.
.jpg)


2/ Depending on your which model Van-Rack you have it could have 1 or 2 “main carrier arms” (see green arrows above).

3/ Loosen off the two anti-rattle bolts (see green arrow above) and pull out the quick-release pin.

4/ The “main carrier arm” (or two arms if it’s a 3 or 4-bike carrier) slips right off the Van-Rack leaving you with this.
.jpg)
5/ Slip the “main carrier arm” (or arms) onto the adapter, insert quick-release pin and tighten the anti-rattle bolts (see point 3 above) and your Van-Rack is now fitted to your car and ready to go.


“Tall” post above – the most common setup – used on vans and campers where you need to get the bike rack (and bikes) up and over toolboxes, gas bottles and spare wheels etc.


"Short” post above – used on vans and campers where height is not an issue.


.jpg)
.jpg)
.jpg)
Remove quick-release pin and loosen anti-rattle bolt

Lift the whole assembly off
.jpg)
Set up your bed, job done. Now crack a cold one!
If you need to carry more than 2 bikes, check below pic to see for yourself how much room is needed on your “A” frame.
.jpg)
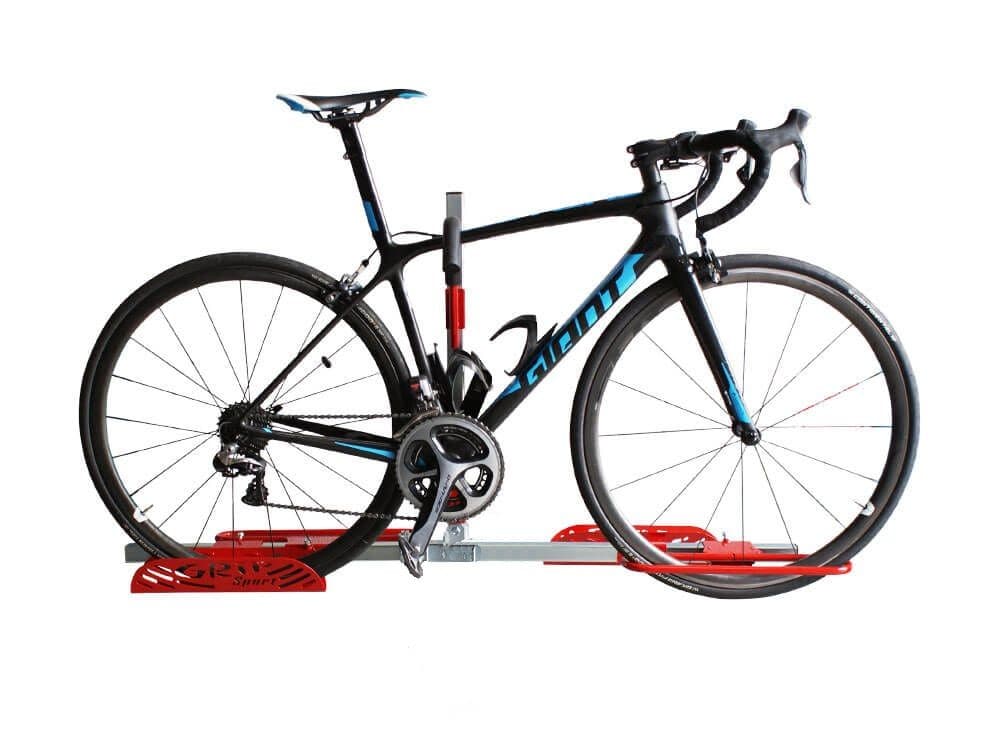
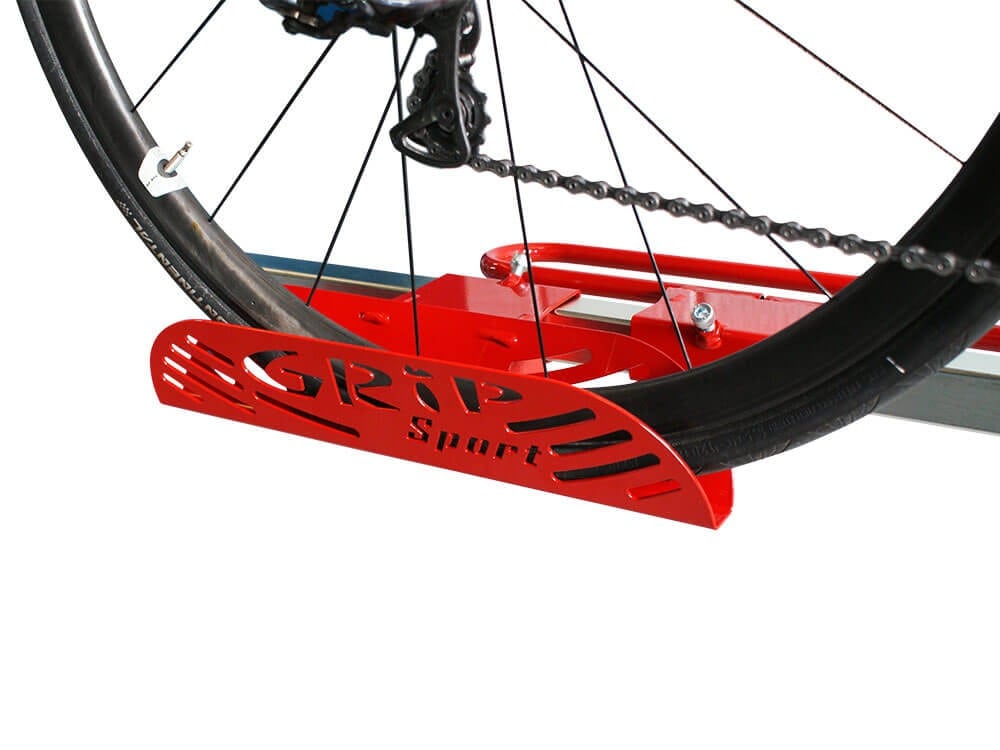
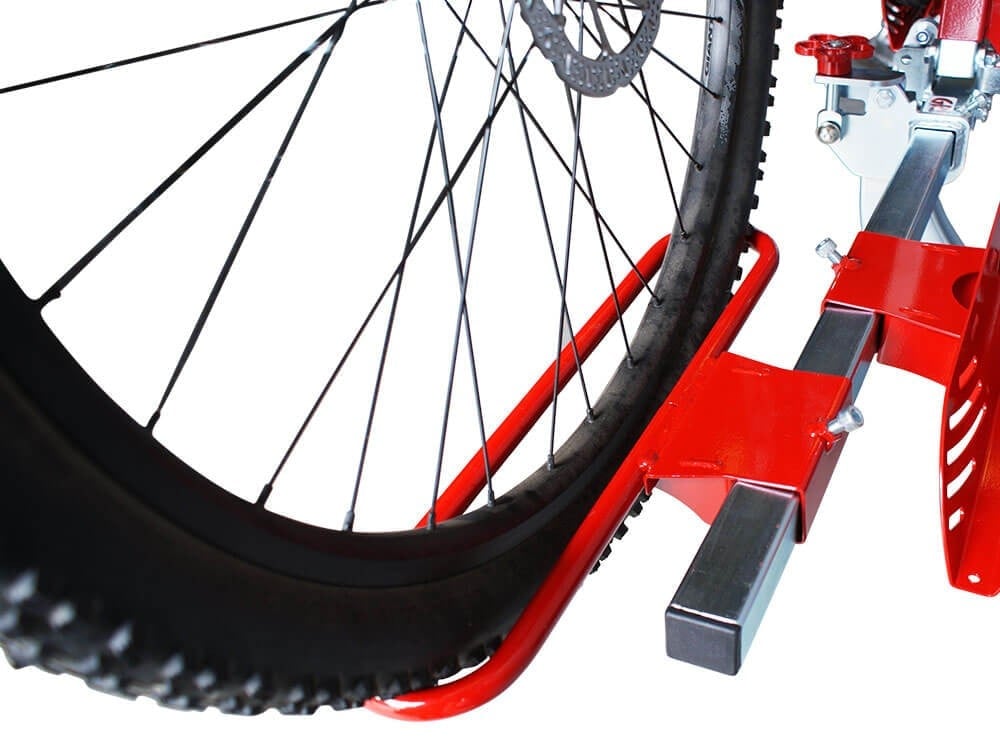
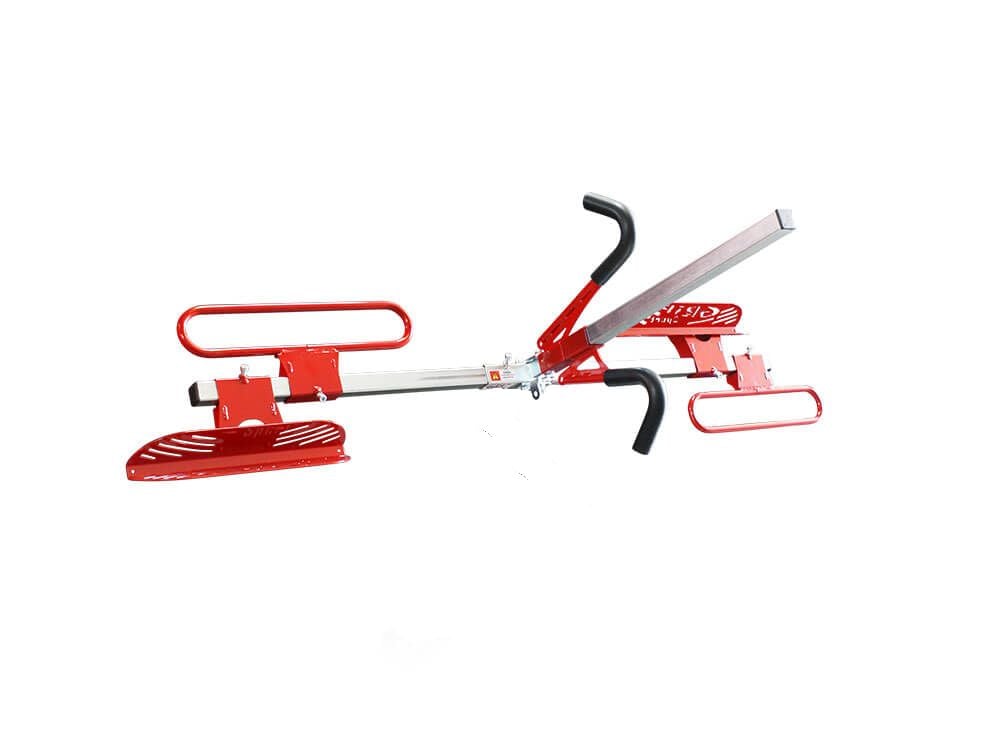
Gripsport's Set & Forget Bike Positioning uses a wheel “hoop” for the front wheel, but instead of another “hoop” for the back wheel (forcing you to alter the spacing between the hoops every time you want to carry a different size bike), the back wheel simply sits down into our “taco” shaped channel… which means you can load up any size bike from a BMX to the largest road or mountain bike in seconds and without having to re-setup your carrier for a shorter (or longer) bike.
Each “taco” shaped wheel channel is supplied with its own heavy-duty cinch strap. For extreme driving situations, or when carrying bikes with very wide tyres, we recommend strapping the rear wheel down into the taco channel.
.jpg)
Note 1 – when carrying bikes with no top tube at all for the carrier “hook” to hold down onto (see the 1st photo below ) you will need to use a “top-tube adapter” (as per the 2nd photo below).


.jpg)
.png)
.png)